# Settings
# Overview of settings
The Settings window consists of the following sections:
You can quickly find the desired setting using the search bar:

You can manage many entities of the program like FTP-connections, CSV templates, metadata sets and others. You can hide unused elements by clicking on the crossed-out eye located to the right of the selected element.

If you decide to restore an item, go to Settings, select the section you need (CSV templates, connection settings or metadata sets) and click on the button located to the right of the selected item.

If you want to delete a previously created status, connection, template or metdata set, click on the cross located to the right of the element name.

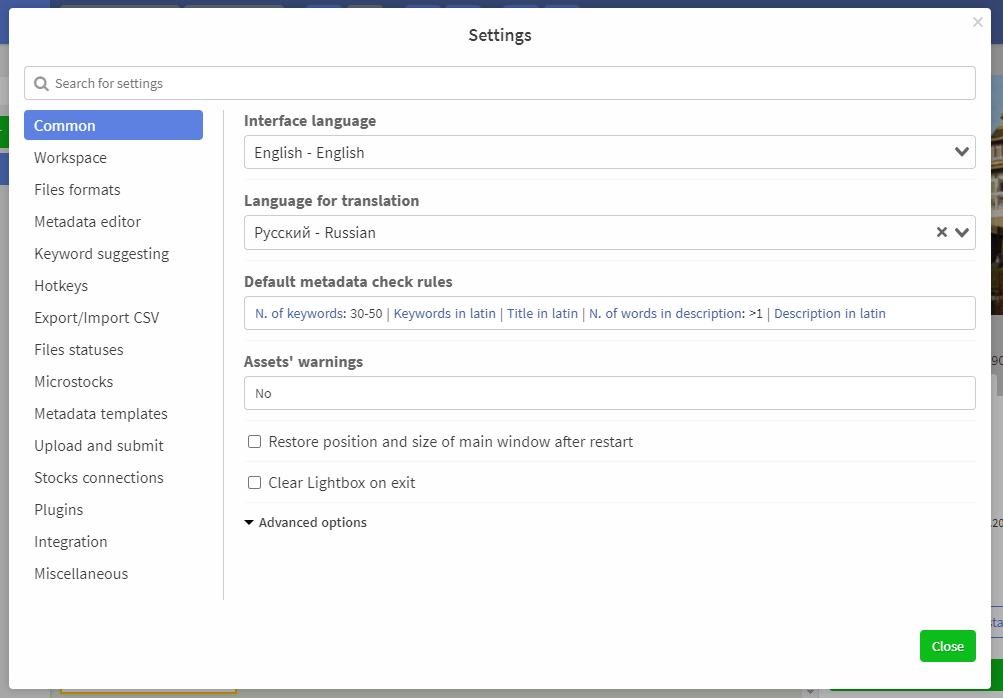
# Common
In this section, you can configure the language, metadata check rules and file warnings.
# File readiness check
Metadata check rules determine how to check if file is ready to be uploaded. Ready files are marked with a green circle. You can configure metadata check rules in Settings -> Common -> Default metadata check rules:
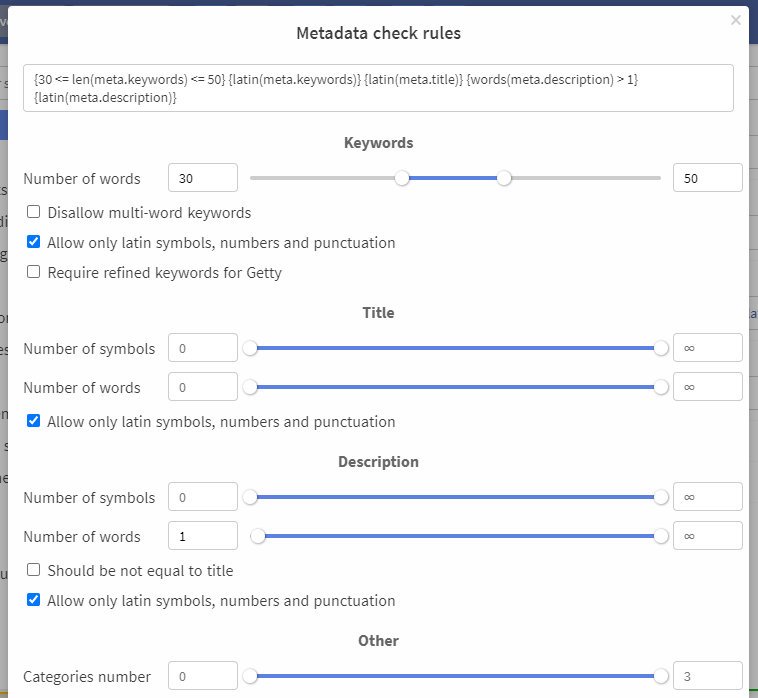
To set up, you can use the visual form or enter the checking conditions manually in the field above. You can learn more about how to set conditions here
TIP
Conditions in filters, metadata check rules, and warnings are completely compatible. You can, for example, use some conditions from warnings for defining readiness checking rules and vice versa
# File warnings
Warnings allow you to mark files that do not meet technical requirements. You can configure the display of warnings in the Settings -> Common -> Assets' warnings section:
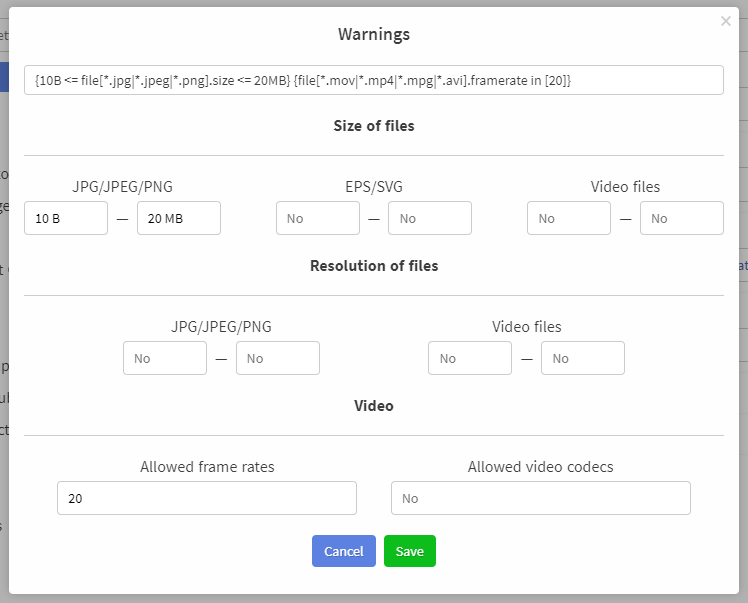
To set up, you can use the visual form or enter the checking conditions manually in the field above. You can learn more about how to set conditions here
TIP
Conditions in filters, metadata check rules, and warnings are completely compatible. You can, for example, use some conditions from warnings for defining readiness checking rules and vice versa
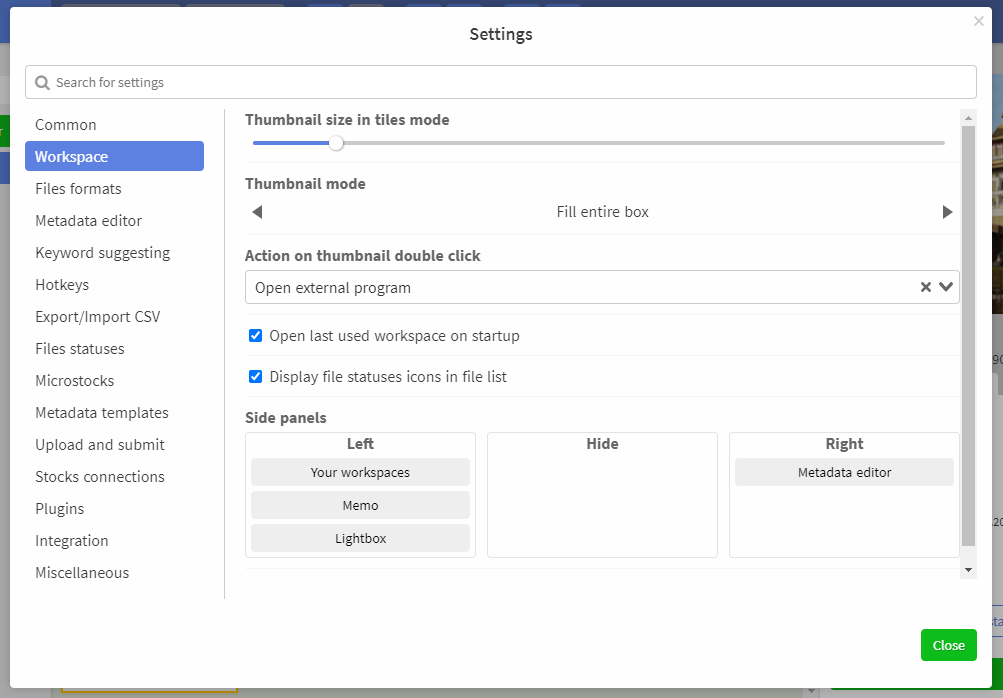
# Workspace
In this section, you can control the size, display mode of thumbnails and positions of side panels
Some users may find it inconvenient to select files when they are not very bright. For this reason, it is possible to disable file shading, which is located in the advanced settings. If the setting is turned off, then shading will not occur when selecting multiple files.
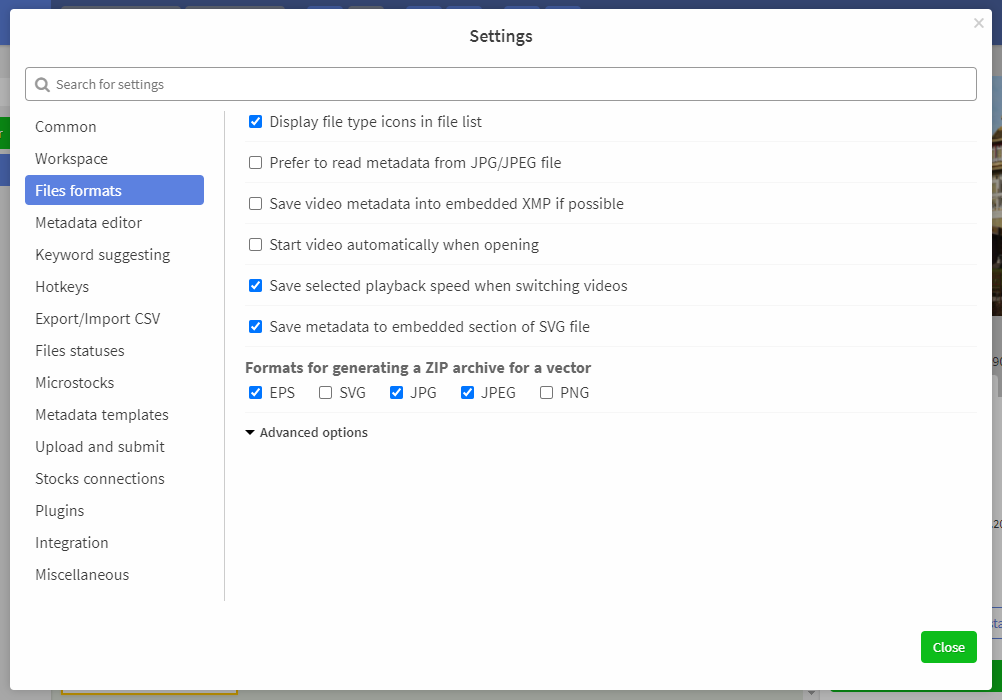
# Files formats
Allows you to set whether to save the selected playback speed when switching video and metadata to embedded sections, as well as display the file type icon. You can adjust the width and height when generating a vector preview in the advanced settings.
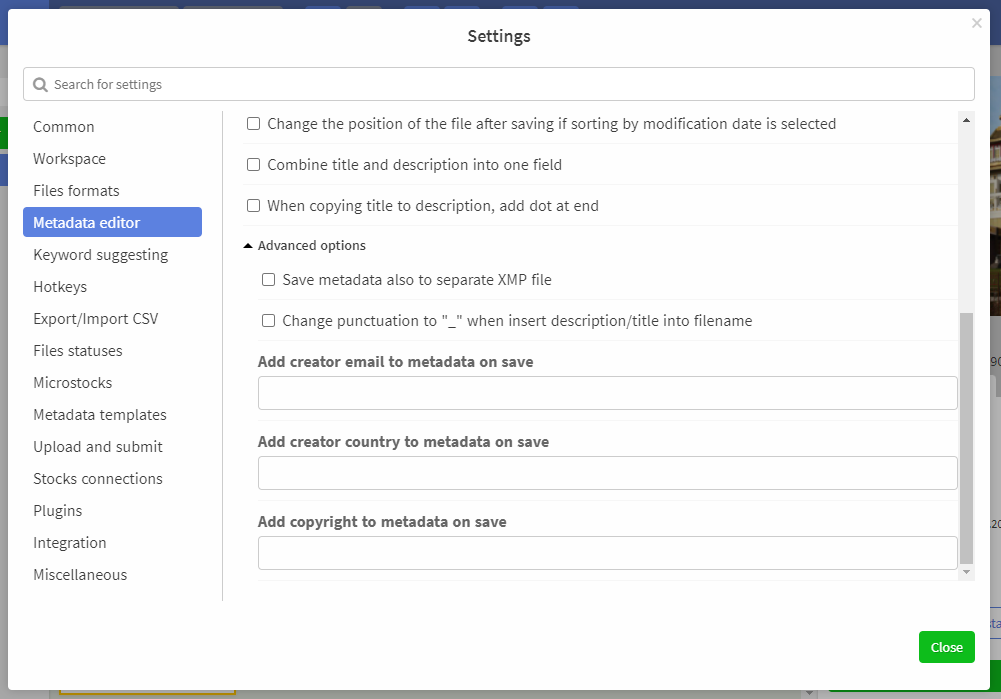
# Metadata editor
In the section, you can configure the display of a word delete button and a tooltip when hovering over a keyword, set a key line separator (either a new line, or a comma, or a semicolon).
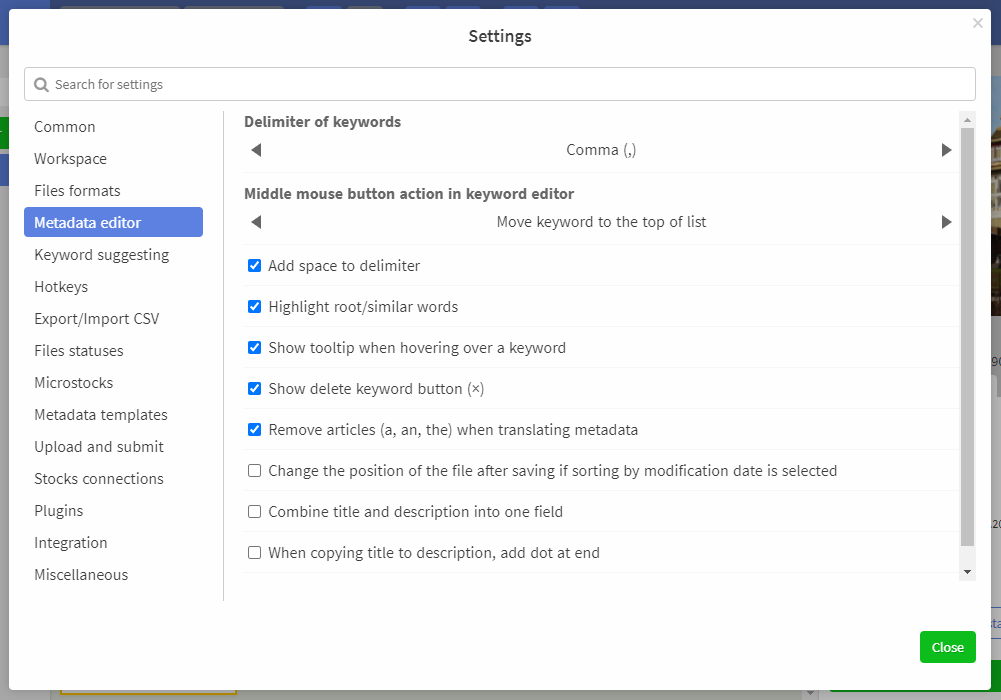
You can add the author's email, country, and author's copyright to the metadata when saving, and set the metadata to be saved to a separate XMP file in the advanced settings.
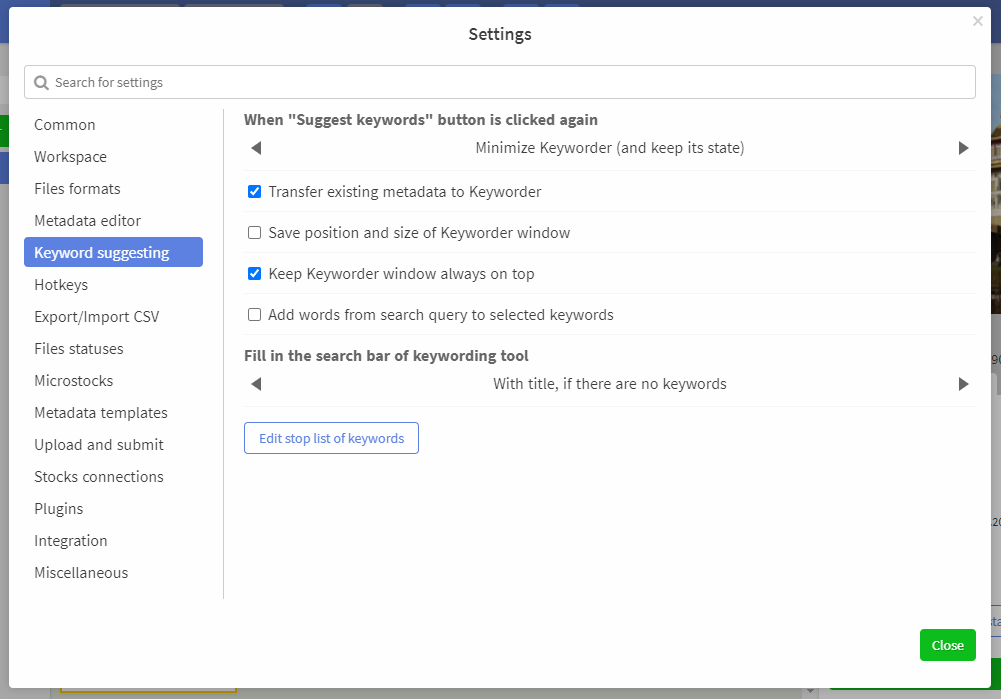
# Keyword suggestings
Here you can choose what to do when you click on the "Suggest keywords" button, fill in the search string when selecting keywords with a title or description, select the location of the keyword suggestings window and the transmitted metadata.
# Hotkeys
It is impossible to imagine a handy tool without hotkeys that speed up your work many times over. ImStocker Studio have hotkeys too and moreover you can easily customize them however you like. You can do it in a special tab “Hotkeys - Assign hotkeys” in the program settings:
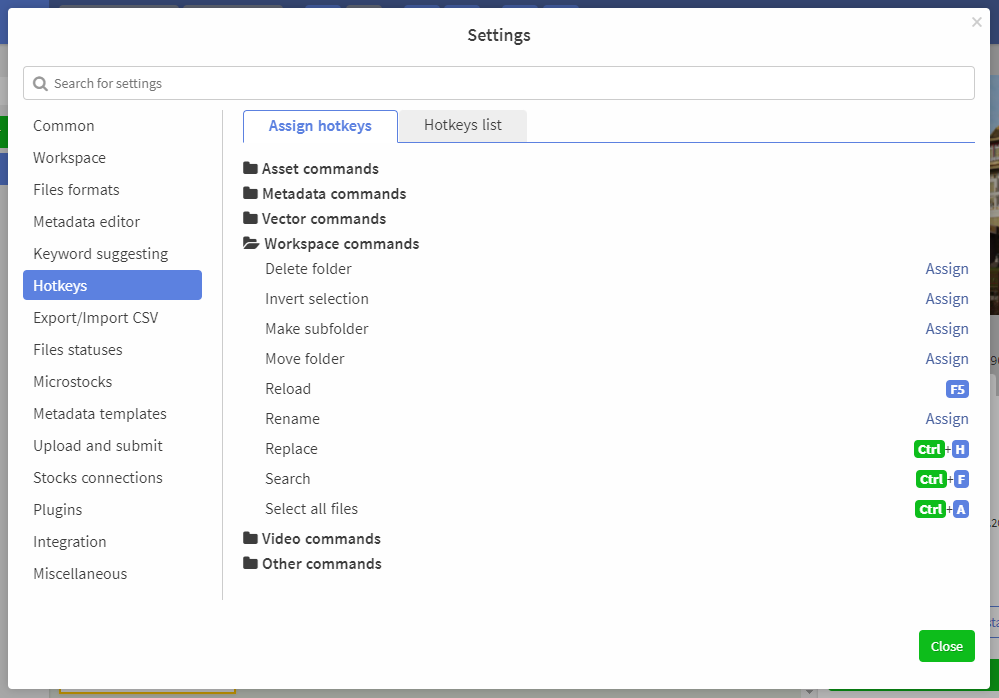
In total, more than 60 commands are currently available in the program, divided into six groups: working with files, with metadata, with a vector, with workspaces, with video, and other commands. You can assign your own hotkey to each of these commands. To do this, click on the command you are interested in and specify the keyboard shortcut in the pop-up window:

In addition, if you try to assign a hotkey that is already in use, a corresponding warning is displayed, and you are also prompted to specify the order in which commands are executed. Thus, it is possible to make some sort of macrocommands. It allows you perform several actions by pressing one hotkey combination, for example, 1) change keywords to singular form, 2) sort the keywords alphabetically A → Z, and then 3) remove the words that exceed the limit.

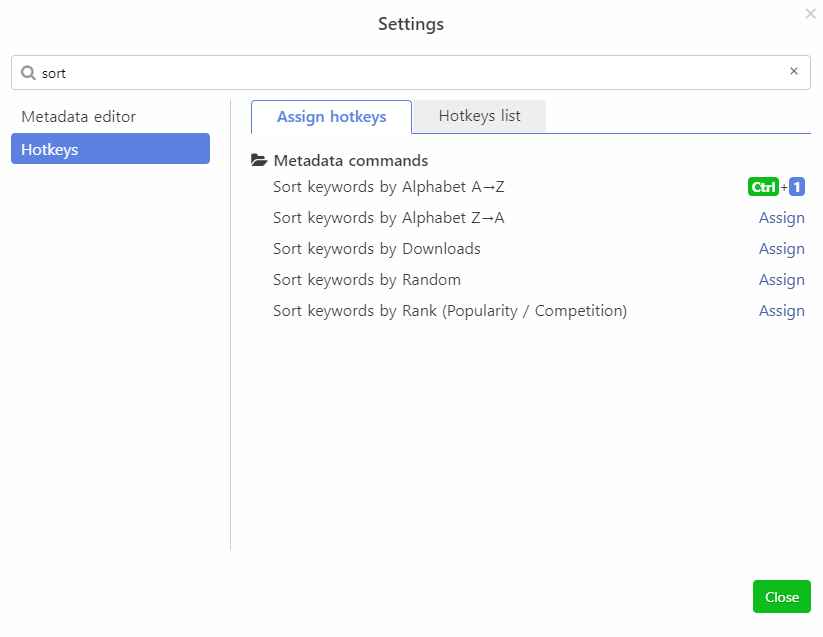
If you want to assign a hotkey to a specific command, you can enter its name in the search bar:
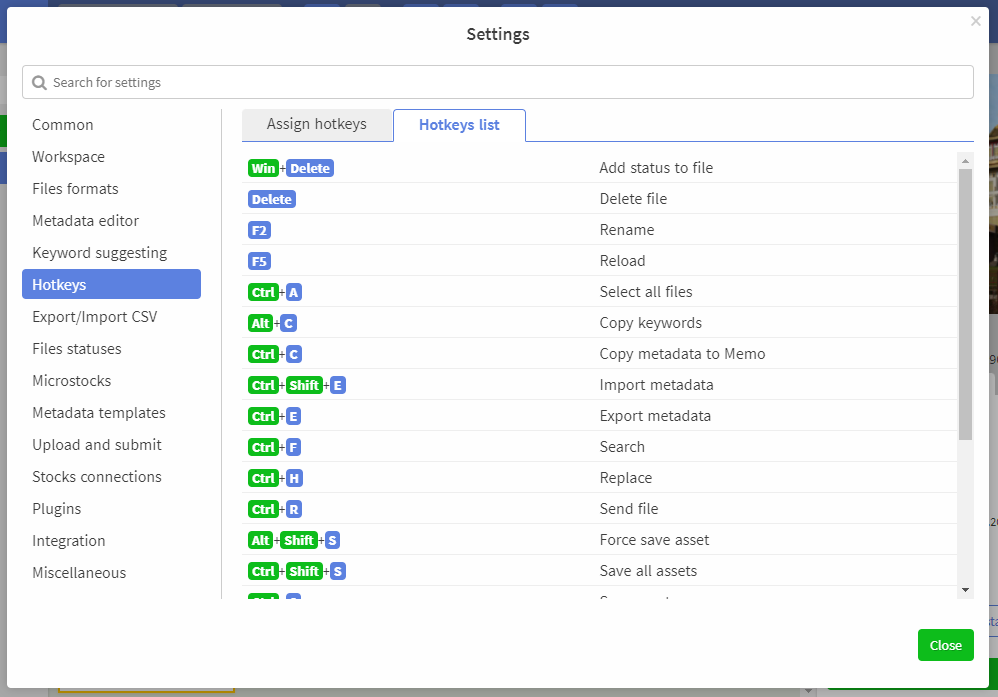
To see the list of all assigned hotkeys you can open the tab Hotkeys list.
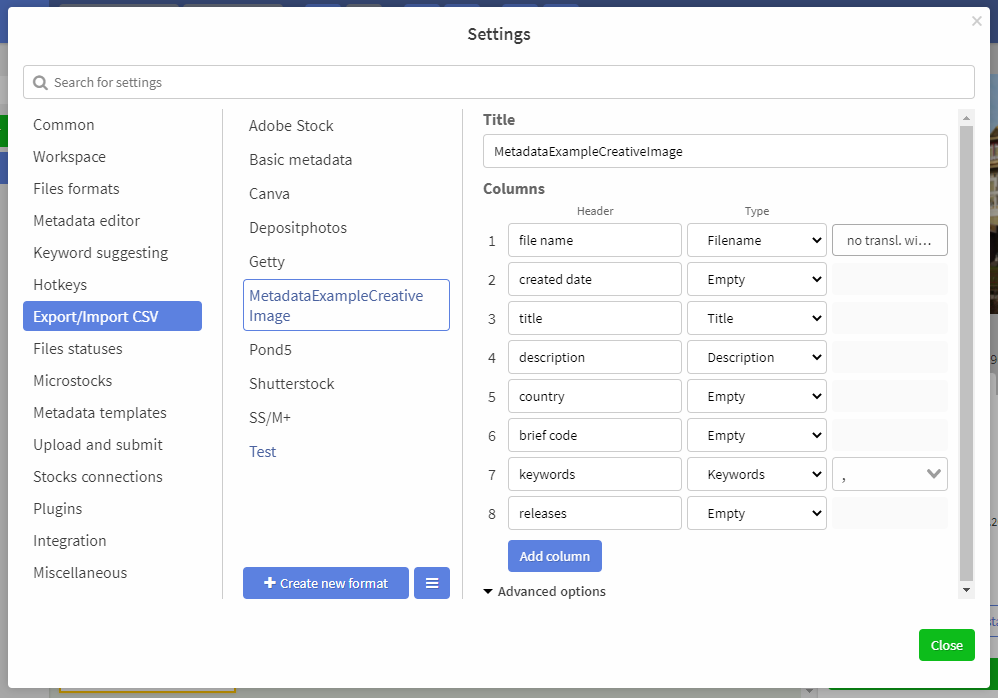
# Export/Import CSV
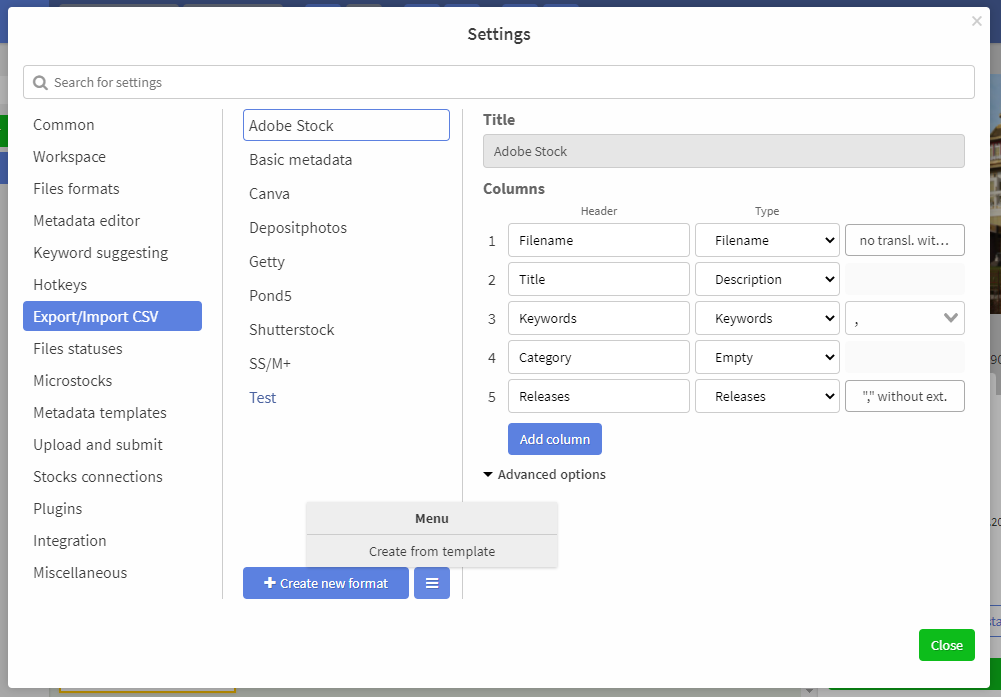
The section contains CSV formats for metadata import/export. To add a new csv format, click the Create new format button. You can also create a template by simply uploading a CSV file. The program will do everything for you. To do this, click on the blue drop-down button with 3 white horizontal lines and select “Create from Template” from the menu.
Then select the file and click the "Open" button.
# Files statuses
To manage file statuses in the settings, there is a special section “Files statuses”. Here you can create a status and select the icon, color, name you like for it, whether it is binded to microstocks.
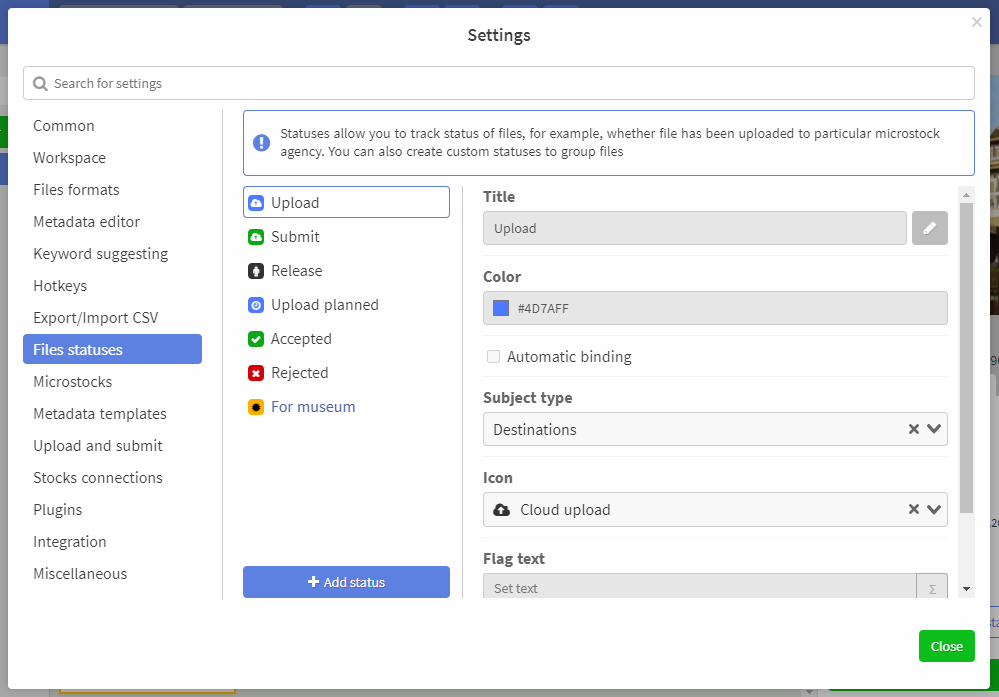
To create, click on the blue button at the bottom of the “Add Status” dialog window.
# Microstocks
Contains a list of microstocks to which submission processes, microstock connections, CSV templates are attached and which determine the list of metadata sets. To add a new microstock, click on the Add microstock button.
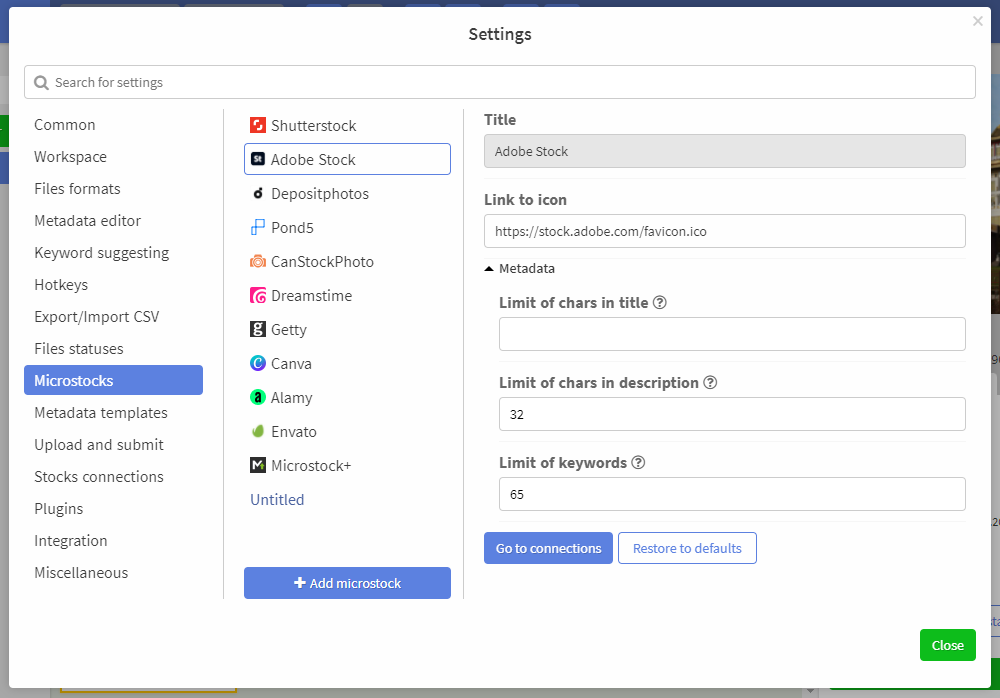
In the section Metadata you can set limits on the number of keywords, the length of the title and description.
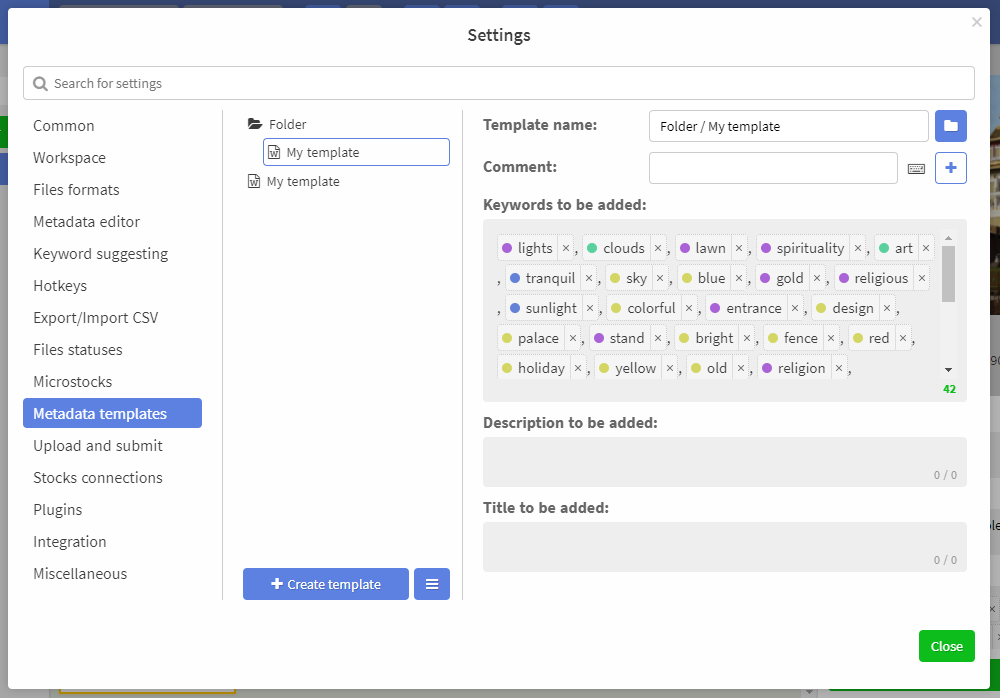
# Metadata Templates
Contains basic metadata templates. To add a new template, click the Add template button.
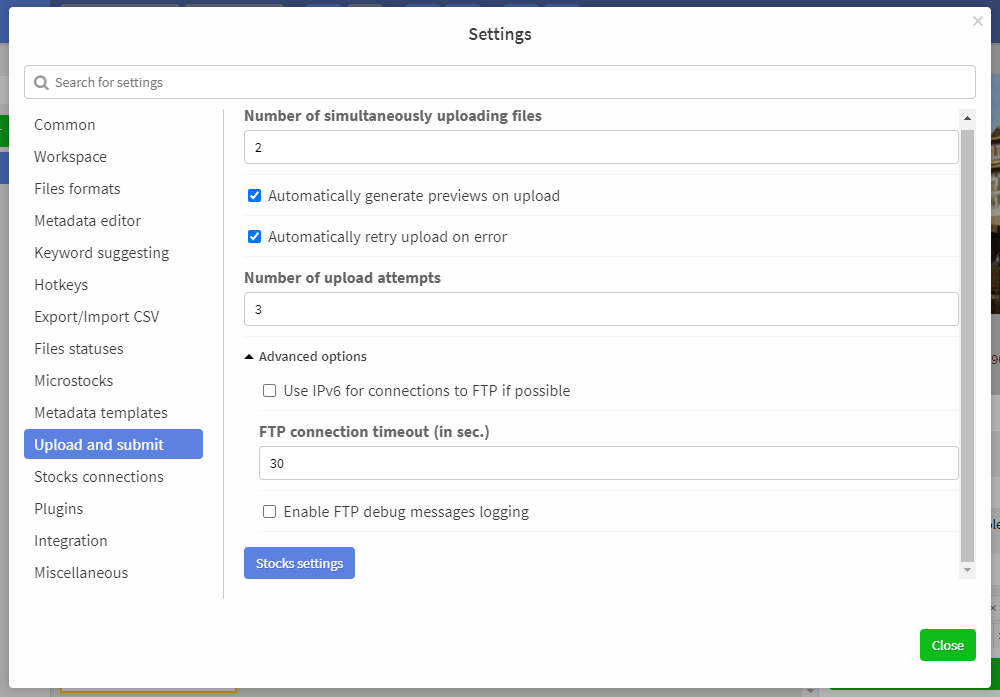
# Upload and submit
Here you can set the number of simultaneously uploaded files, the number of upload attempts, the FTP connection timeout, and whether you want to automatically generate previews when uploading, and much more.
# Stocks connections
Contains the main connections to stocks. To add a new connection, click on the Add new stock button.
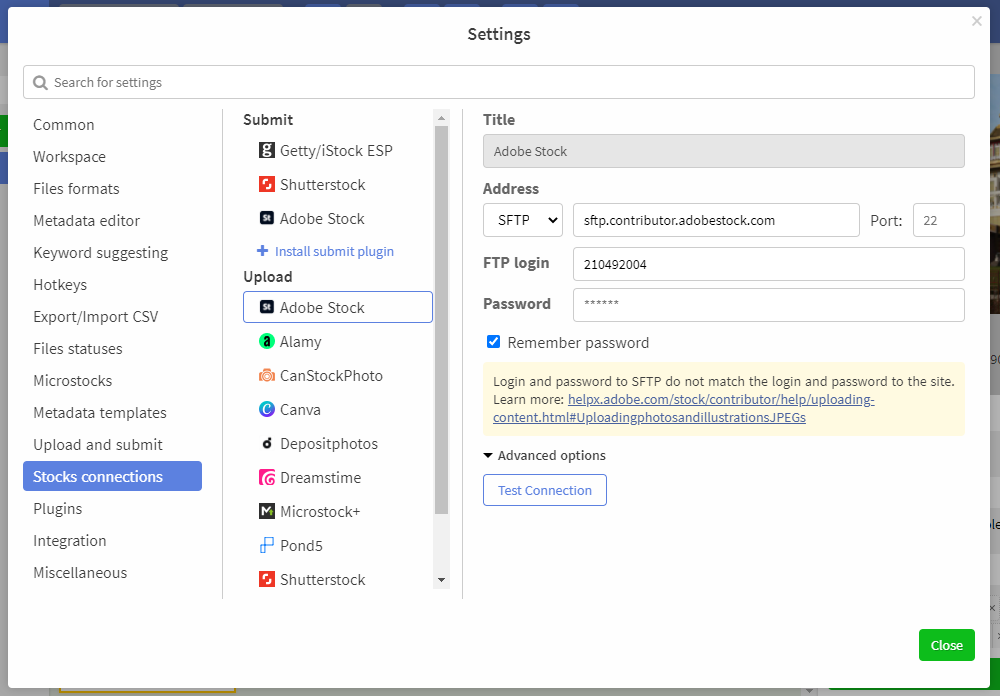
When creating a connection, the following is specified:
Connection name - enter any value by which it will be convenient for you to find this connection
Connection type: FTP, FTPS (FTP + secure connection) or SFTP
Host: server address
Port: depends on the type of connection and usually does not need to be changed
Rules for uploading by file types. Here you can:
- select which types of files can be uploaded via this connection
- specify the method of loading (for example, whether the vector should be loaded along with the preview and whether it is necessary to create a ZIP archive)
- specify a special upload folder
- specify a list of additional files that should be uploaded (for example, RAW sources, PSD files)
Default upload folder - common for all formats
Related microstock - to which microstock the "Loading" status will be linked after a successful upload. If not specified, then such a microstock will be created automatically
Whether to transliterate file names - some FTP servers only accept files whose names are written only in Latin letters
Save metadata in SS/M+ compatibility mode - is it necessary to add additional data to JPG files that can be read by these programs
In addition, at the bottom of the advanced settings section there are copy and paste settings buttons. Useful if you want to pass connection parameters in a fast way
# Plugins
In this section you can manage plugins.
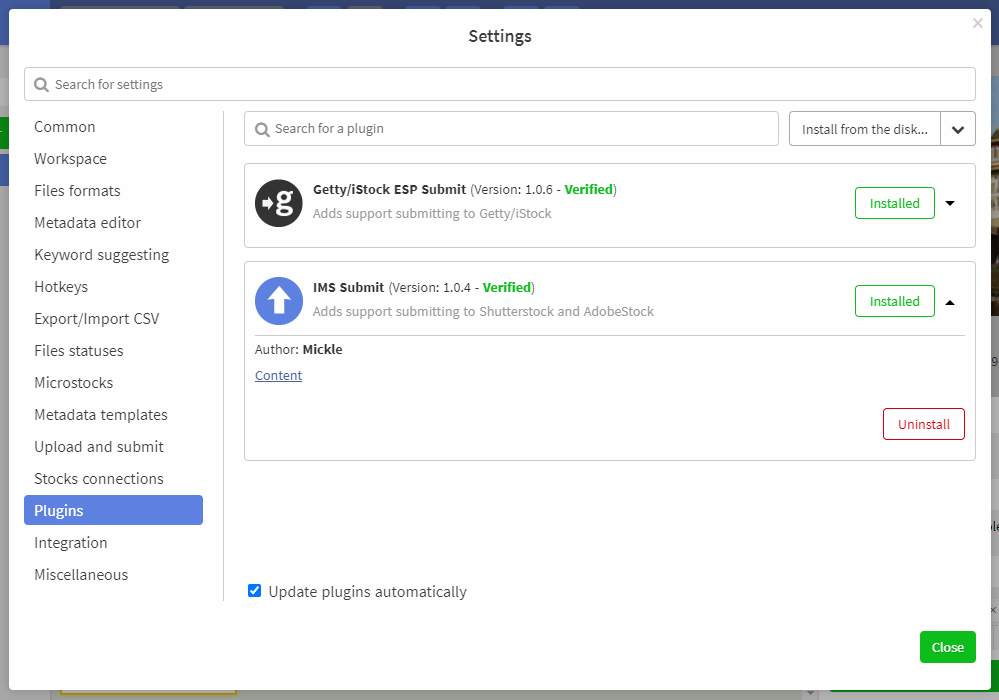
You can install plugins from our online catalog or choose a local plugin on your computer. To install a plug-in from the online catalog, find desired plugin in the list and click the Install button. To install a plugin from your disk, click Install from disk... and select the plugin file with the extension ims-plugin
If you want to create a new plugin, please see our plugin developer guide.
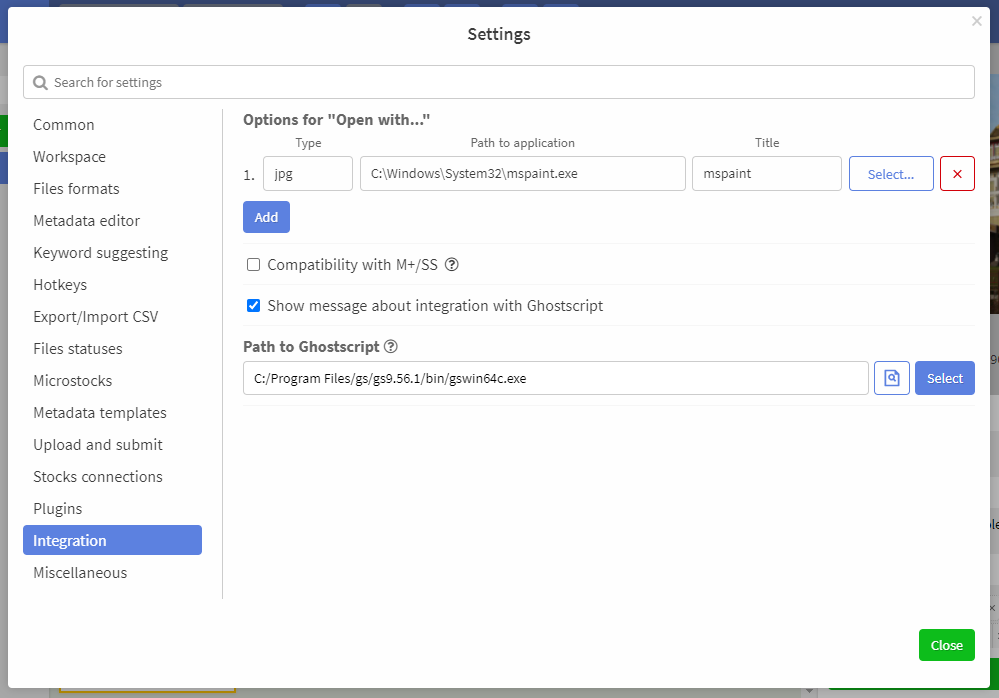
# Integration
Allows you to change the list of external applications that can be used to open files. Here also you can set the path to Ghostscript. You can learn more about Ghostscript here.
# Miscellaneous
In the section, you can clear the preview cache and open the folder with logs.
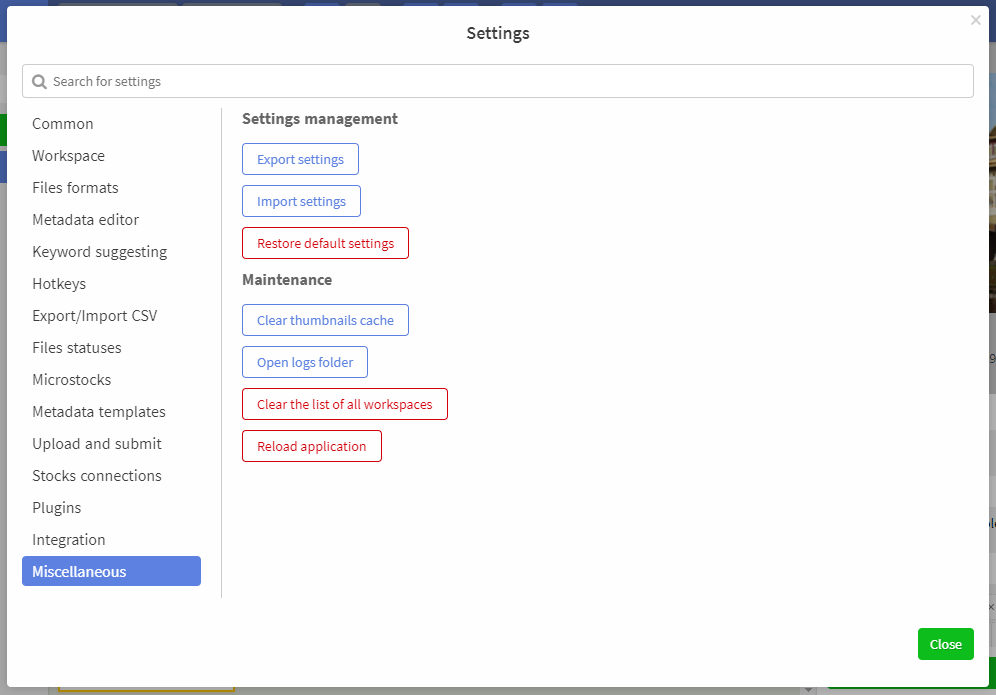
In Settings -> Miscellaneous -> Settings management you can perform 3 operations:
Export settings Now you can save the application settings to a separate file, transfer it to another computer, or share it with another person. To do this, click the
Export settingsbutton. A dialog window will appear in which you need to select groups of settings to be exported. There are 10 groups:- "Application settings",
- "Interface changes",
- "Hotkeys",
- "CSV formats",
- "Files statuses",
- "Microstocks",
- "Metadata templates",
- "Stocks connections",
- "Integration settings",
- "Keyword dictionary"
After that, you need to select the folder where you would like to save the settings placed in the file with the “ims-settings” extension.
Import settings. Suppose you already have exported settings and want to apply them. To do this, click on the
Import settingsbutton and select the file you would like to import. Please note that the file must be strictly with the "ims-settings" extension. After that, the file is analyzed and you are asked to select the groups of settings should be imported. Once selected, your new settings are ready for use.Restore default settings. With this function, you can return the basic settings of the program at any time.
# Integration with Ghostscript (Windows)
To activate generating of EPS thumbnail on Windows, you can integrate IMS Studio with Ghostscript (opens new window)
To do this, install Ghostscript on your computer, then open the "Integration" section and click the auto search button

If it was unable to determine where Ghostscript is to be installed, then you can set it manually by clicking the "Select" button. You must find and select the gswin64c.exe executable (but not gswin64.exe)
# Integration with Ghostscript (Mac)
To activate generating of EPS thumbnail on MacOS, you can integrate IMS Studio with Ghostscript (opens new window)
The easiest way to do it is to use Homebrew (opens new window) package manager:
- Install Homebrew if it is not installed yet. Run following command in Terminal:
/bin/bash -c "$(curl -fsSL https://raw.githubusercontent.com/Homebrew/install/HEAD/install.sh)"
- Install poppler package. Run following command in Terminal:
brew install ghostscript
- Click "Auto search" button in Settings / Integration tab of ImStocker Studio

Or enter the path manually. You can check where ghostscript is located by running which gs command in Terminal. It will return the path like this: /usr/local/bin/gs
# Integration with Poppler (Mac)
To generate SVG-file from EPS-file you need to install Poppler (opens new window) tools on Mac
The easiest way to do it is to use Homebrew (opens new window) package manager:
- Install Homebrew if it is not installed yet. Run following command in Terminal:
/bin/bash -c "$(curl -fsSL https://raw.githubusercontent.com/Homebrew/install/HEAD/install.sh)"
- Install poppler package. Run following command in Terminal:
brew install poppler
- Click "Auto search" button in Settings / Integration tab of ImStocker Studio

Or enter the path manually. You can check where pdftocairo is located by running which pdftocairo command in Terminal. It will return the path like this: /usr/local/bin/pdftocairo