# Getting started
# First launch
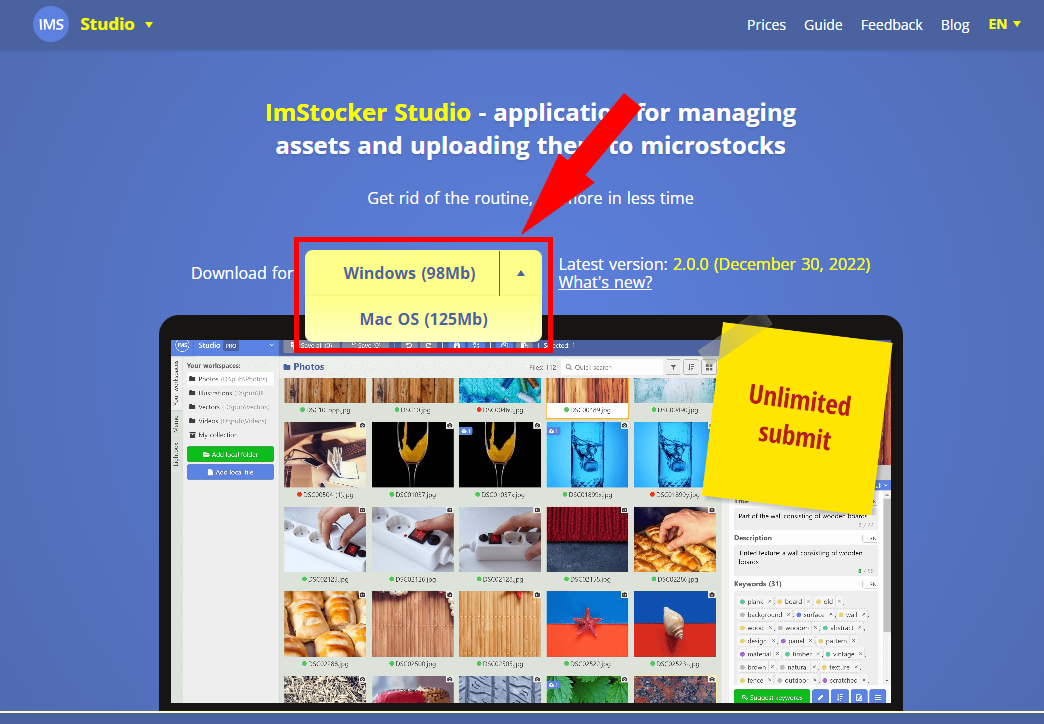
ImStocker Studio available on home page of our site https://imstocker.com/ (opens new window). Click on "ImStocker Studio" to open downloading page

Here you can select your operating system and click corresponding button to start download
After installation and launch, you will be greeted with a welcome window. The current version of the program and the ImStocker account login form are displayed here. If you have not yet registered on our website, click "Register here"
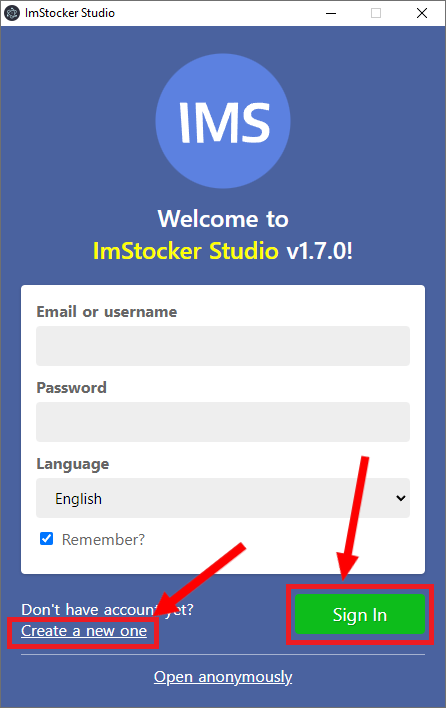
A browser will open with a registration form. Registration in the service is quick and easy, without filling out long questionnaires.

After registering, you will receive an email to confirm your email address. After confirmation, enter the data specified during registration in the login form in the program.
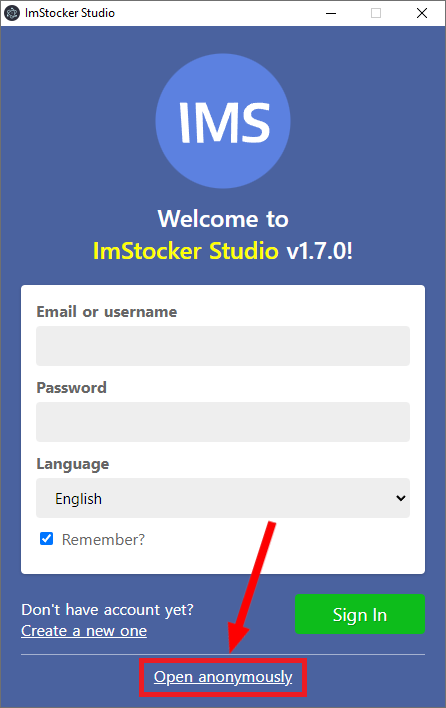
If you just want to look around first, you can skip the registration step by clicking "Log in anonymously"
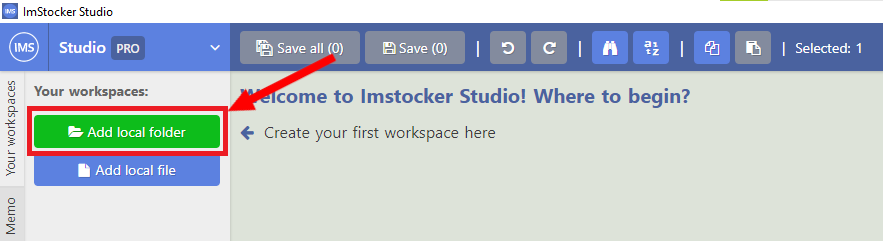
When you first enter the program, you will see a main window that will politely tell you where to start your work with ImStocker Studio:
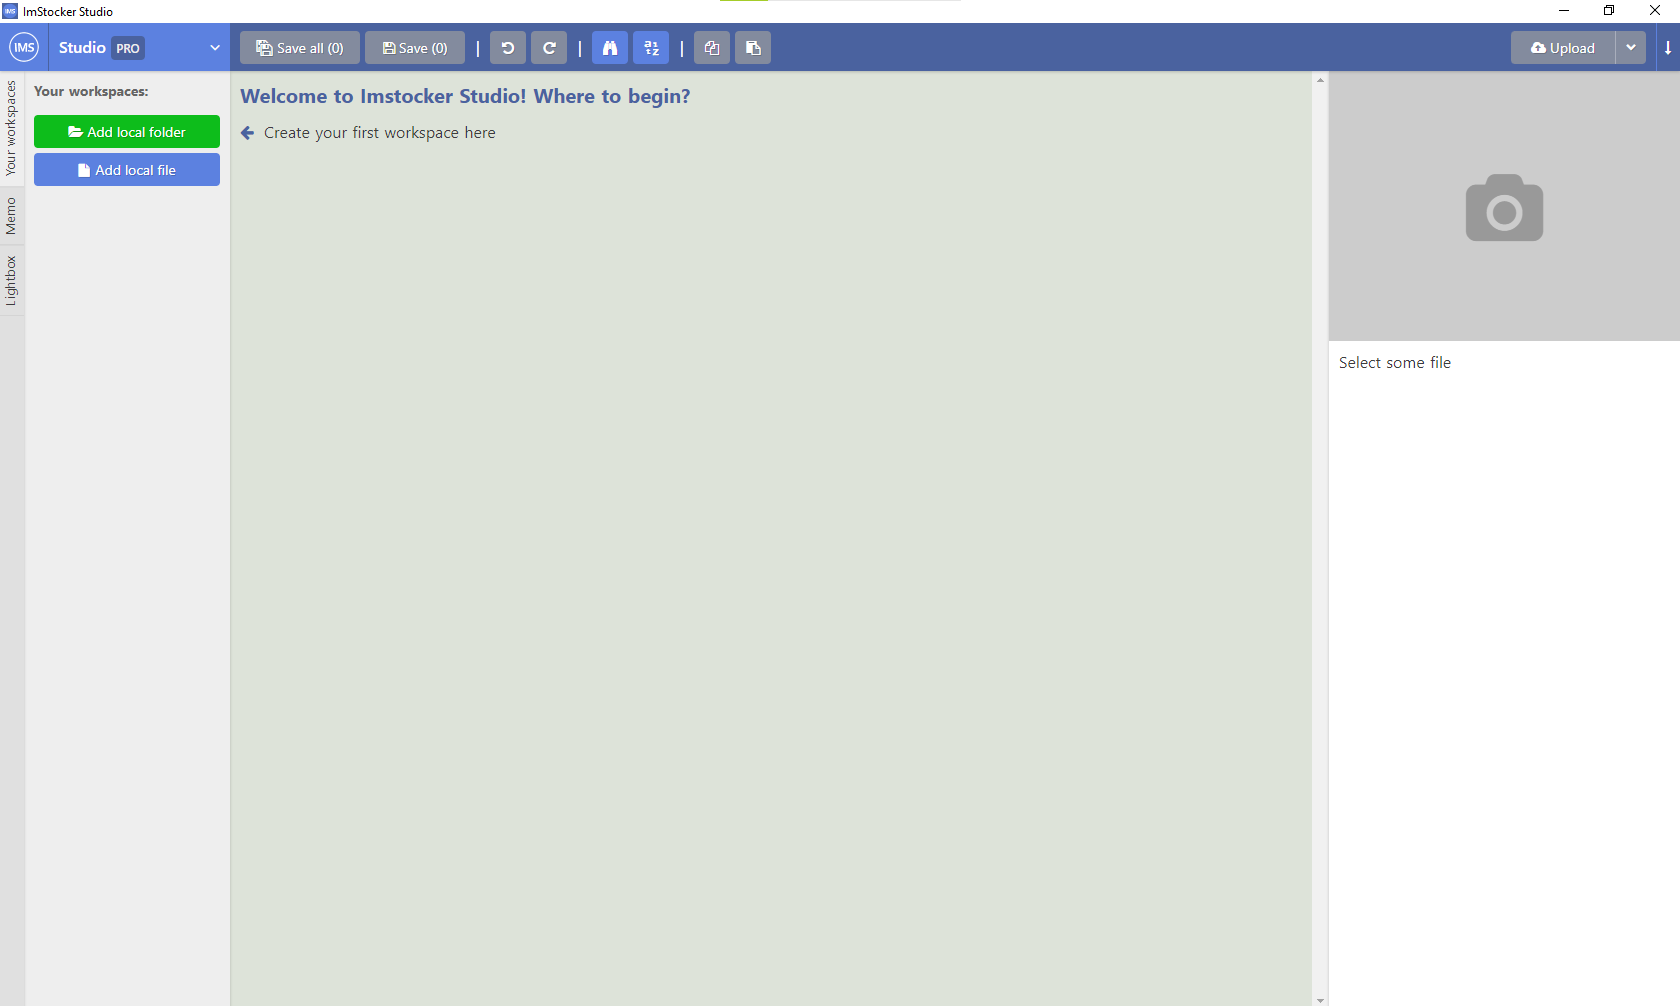
# Main window
The functionality of the main window is divided into the following areas:
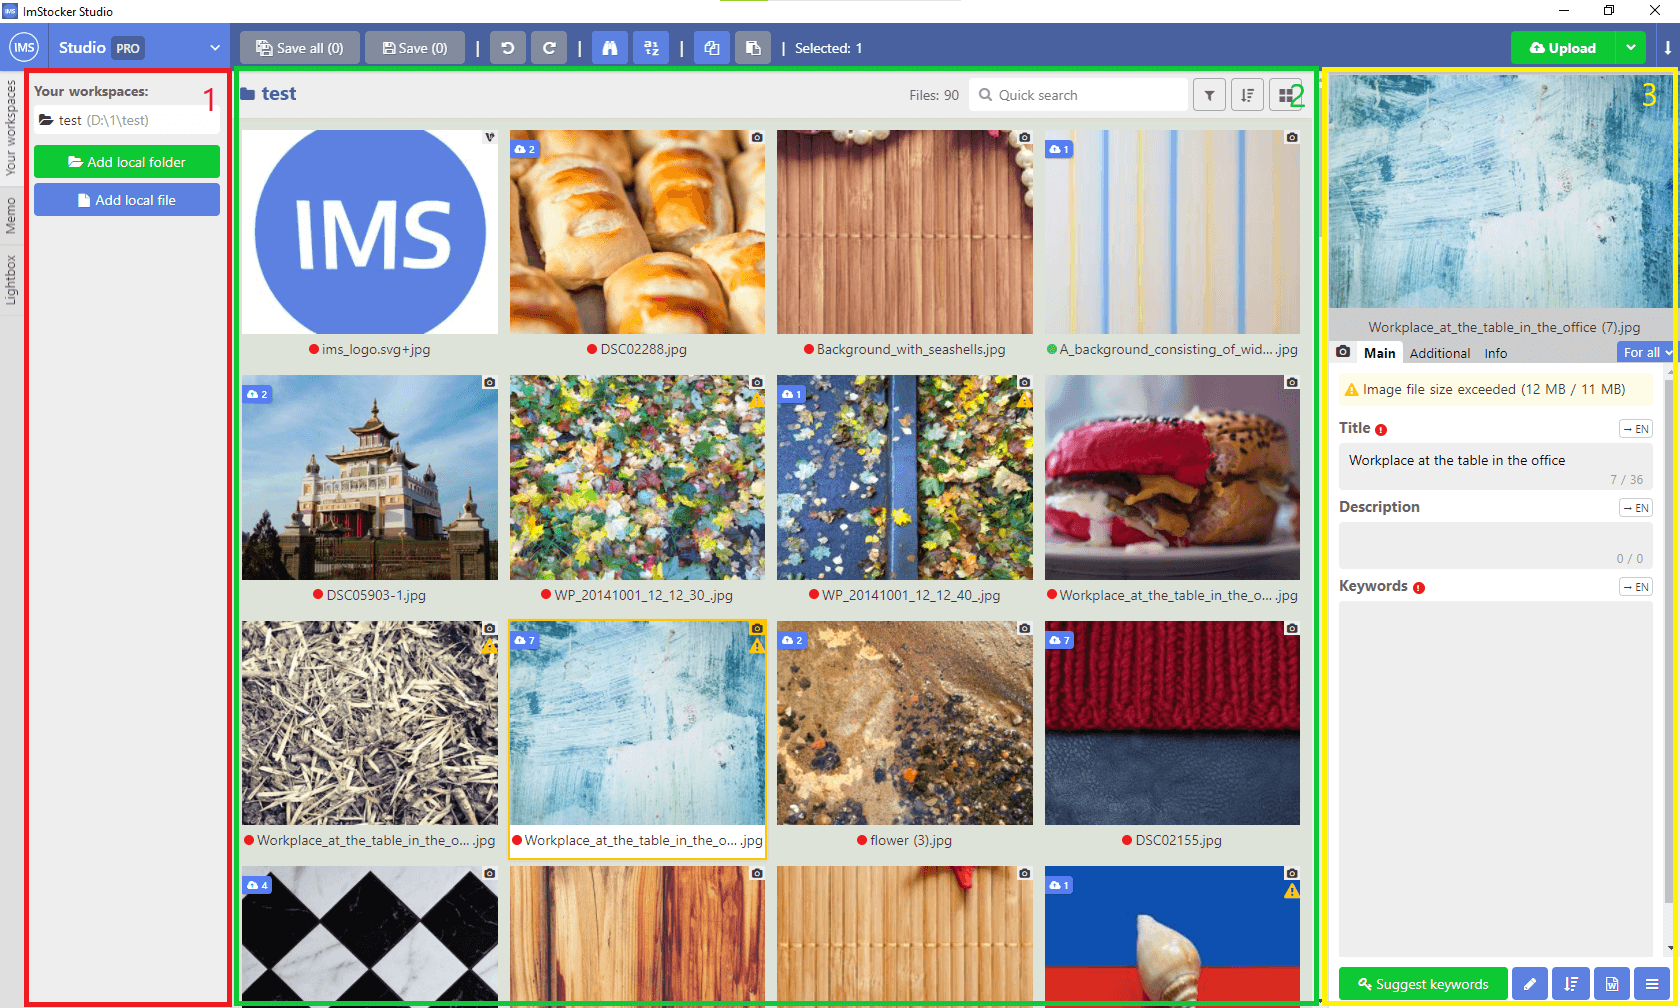
1 - Left side panels. THere are a list of workspaces(open folders), function Memo to quickly copy metadata between files and Lightbox - a place where you can add favorite files, or just files from different folders that you want to work with
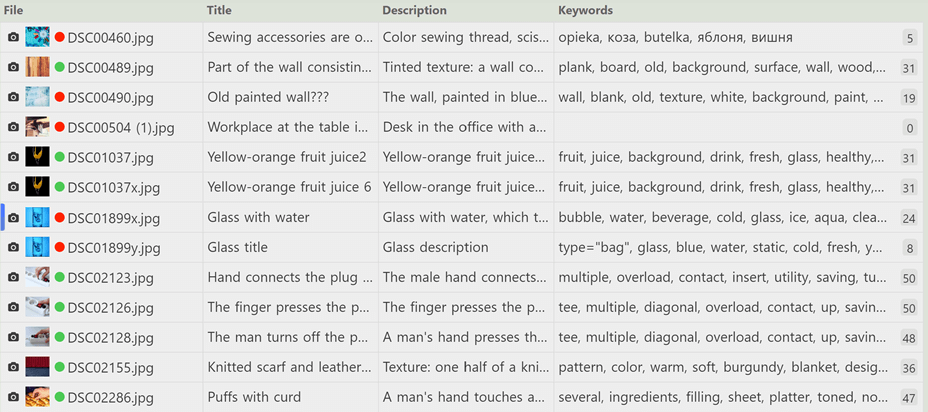
2 - Contents of the current workspace - Interaction with your files takes place here. You can choose the display method (tiles, list, table), set file sorting and specify filter
3 - Right side panels. There are a preview block of the selected file (or files), fields for entering metadata: titles, descriptions and keywords, as well as tabs for additional functions for working with files. More details about this block are described in the section "Editing files"
You can adjust the size of the sidebars by dragging their edges, or move the panel from left to right and vice versa. To move a panel, drag its title or use the special menu in Settings -> Workspace
# Main menu
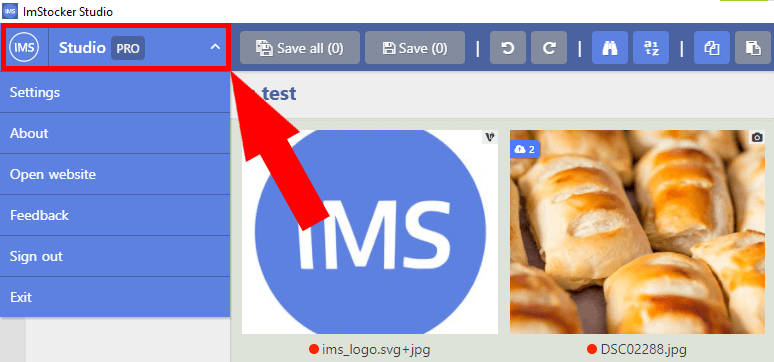
Main menu is located in the upper left corner of the window and contains the following sections:
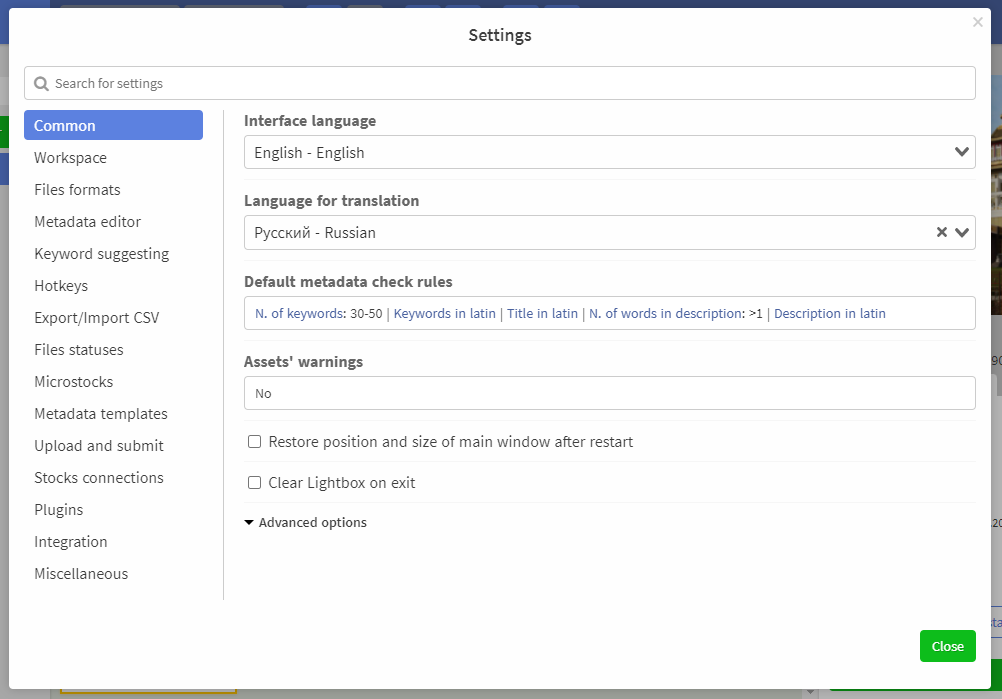
Settings. The program settings contain an impressive number of possibilities. For example, you can change the interface language and translation, customize the interface, change the behavior of various functions, assign hotkeys, create CSV templates, FTP connections, and much more. You can read more about this section in the "Program settings" section
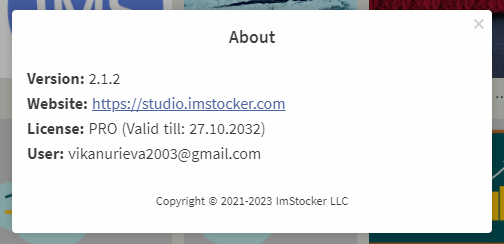
About. Displays a dialog box showing the current version of the program, a link to the site, and if you are the proud owner of a PRO version of ImStocker Studio, your license expiration date (please buy our perpetual license (opens new window) if you don't like expiring licenses) and your email address.
Go to website- opens the program websiteFeedback- here you can report all found issues or suggest new featuresChange user- log out of the current user and log into another oneExit- close the program
# Workspaces
The main interaction with files in the program ImStocker Studio occurs through Workspaces. A workspace is a folder containing files for editing.
To add a new workspace, click Add folder:
After selecting a workspace, folder files supported by the program (more about file types) will be displayed in the central part of the window. If a folder contains two (or more) files with the same name but different extensions, such as image.jpg and image.eps, they will be displayed as one image.eps+jpg file (we denote it as an asset).
To select a file for further interaction with it, click on it with the left mouse button. You can select multiple files at the same time. To do this, use the mouse to select them with a frame, or use the Ctrl/Cmd or Shift keys while clicking on the file.
If you click on the file with the right mouse button, the context menu will open:
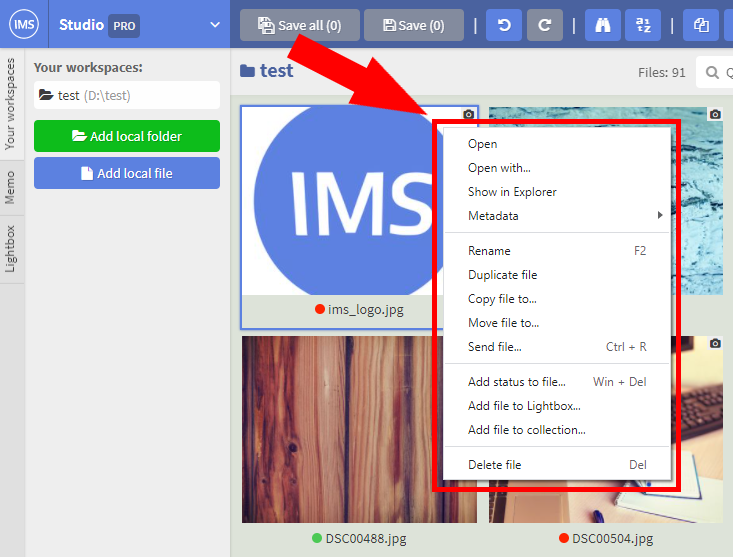
It allows you to quickly open a file to view it in Explorer (or Finder in Mac), copy or paste the copied metadata, as well as rename or move the file to another Workspace / Folder and upload the selected file to the microstock agency. It is important to note that all these actions and many more can be assigned to hotkeys in Settings -> Hotkeys.
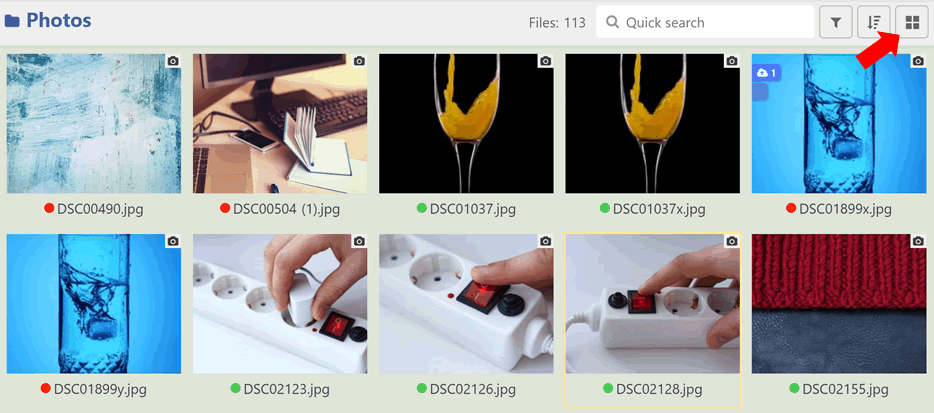
By default, files in the workspace are displayed as tiles, the size of which you can adjust using Ctrl/Cmd + Mouse Wheel or through the Settings menu. In addition to this mode, in the upper right corner of the workspace you can select the "List" and "Table" modes.
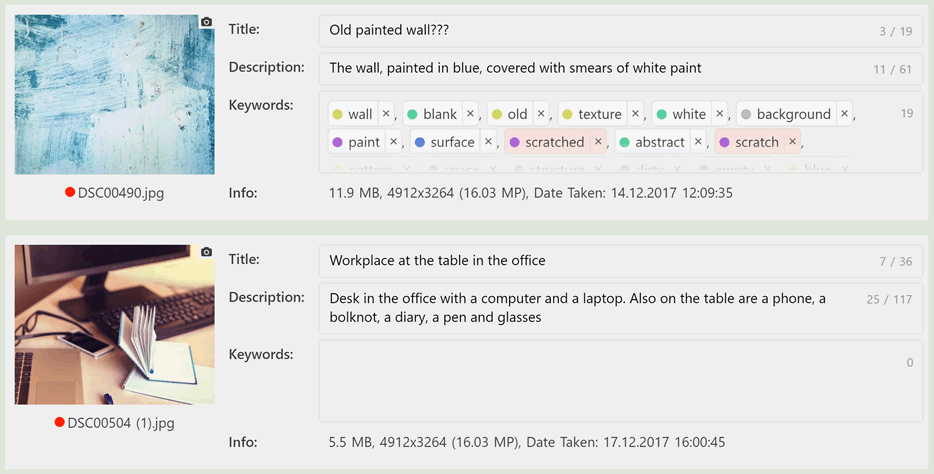
In list mode, files are displayed row by row, while the metadata stored in the files is immediately visible.
In table mode, each file occupies only one line. You can quickly view and edit the metadata of one or more files by selecting the corresponding table cells. In addition, by dragging the edge of a cell, you can quickly fill adjacent cells with the contents of the selected cells.
Also next to the button for changing the display mode is the Sort by button:
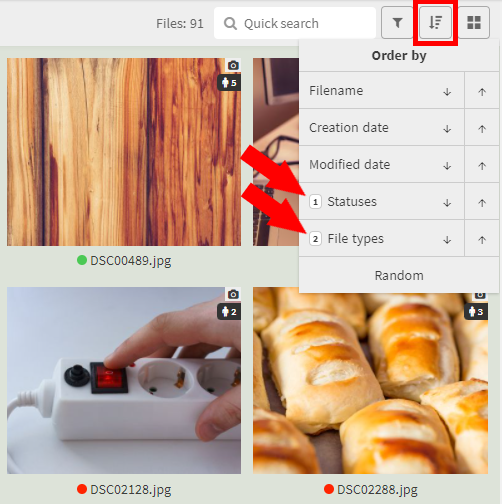
With this button you can set the order in which files should be displayed in the workspace. The following options are available:
Alphabetically - files are sorted by name
By creation date - files are sorted by creation date.
By date modified - files are sorted by the date they were last modified. By default, to prevent files from being moved during editing, this sorting is applied only when the folder is opened. You can change this behavior by enabling in
Settings -> Metadata Editorcheckbox "Change file position after saving if sort by date modified" is selected.By status - files are sorted by the presence of one or another status. More about statuses in the "File statuses" section.
By file type - files are sorted by file type in order: photo, illustration, vector, video. Reverse order respectively: video, vector, illustration, photo.
Random - files are displayed in random order.
You can also select multiple sorting rules at the same time. To do this, hold down the Shift key and select the appropriate sorting rule. So, for example, you can sort files first by status, and then by type. In order not to forget which sorting has more priority, its order is indicated next to the name. If you want to change the order, just click again on sorting, the value will be reversed (if you have selected several options, do not forget about Shift key).
To the left of the sort button there are the filter button and the quick search block. Filters allow you to temporarily hide unnecessary files for some reason. More details about the functionality of filters are described in the "File filter" section. A quick search allows you to find files by name or by the metadata they contain (see the section "Search and replace metadata")
# File ready icon
When the content of the workspace is loaded, each file receives a metadata readiness indicator (a colored circle to the left of the file name):

Possible options:
Grey - the file is not yet filled
Red - the file is partially filled
Green - file is completely filled and ready to upload
By default, a file becomes "green" under the following conditions: the file has from 30 to 50 keywords, the description contains at least one word, and all metadata is filled in English (Latin). You can easily change the rules for yourself through the Settings -> General section (see "File readiness check")
# Warning icon
In addition to the readiness status for metadata, you can also configure the display of a warning icon if the file does not meet the specified technical requirements.

You can configure technical requirements through the Settings -> General section (see "File warnings")
# File statuses
Another distinguishing marks of files are statuses. They show if file belonging to some group.

So, for example, every time you upload a file to the microstock, ImStocker Studio adds a special label to the file to help you figure out which files are uploaded and which are not. In addition, you can create your own statuses. For example, mark those files that you have already retouched, or highlight a group of files on some basis.
You can manage the list of such statuses in the Settings -> File statuses section, which is described here
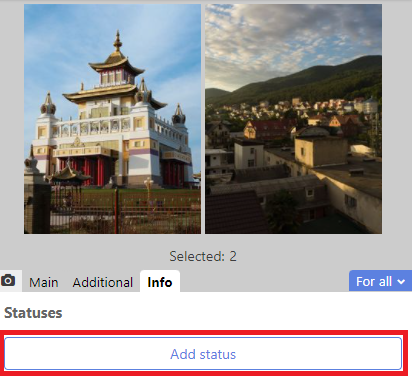
To manually add a status to a file(s), select the files, then go to Metadata editor -> Info and click the Add status button.
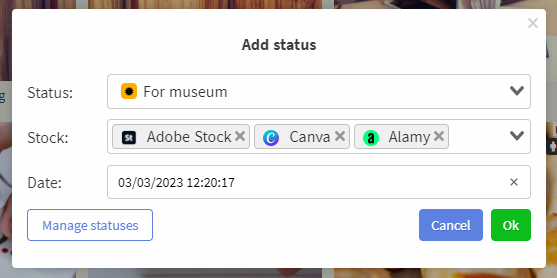
A dialog box will appear where you must select the desired status, date (by default - current) and, if required, one or more stocks to which it applies.
In addition to the mark in the upper left corner of the image, statuses are also displayed in the Metadata Editor -> Info tab.
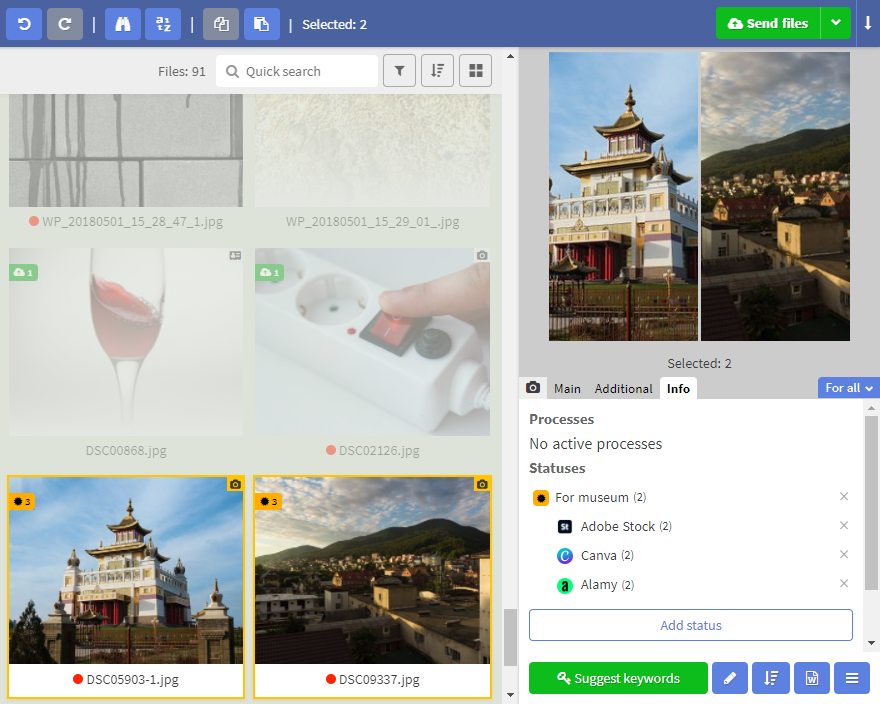
Ready! But if you change your mind, you can freely delete status of file by clicking on the cross to the right of the status name in Metadata Editor -> Info.
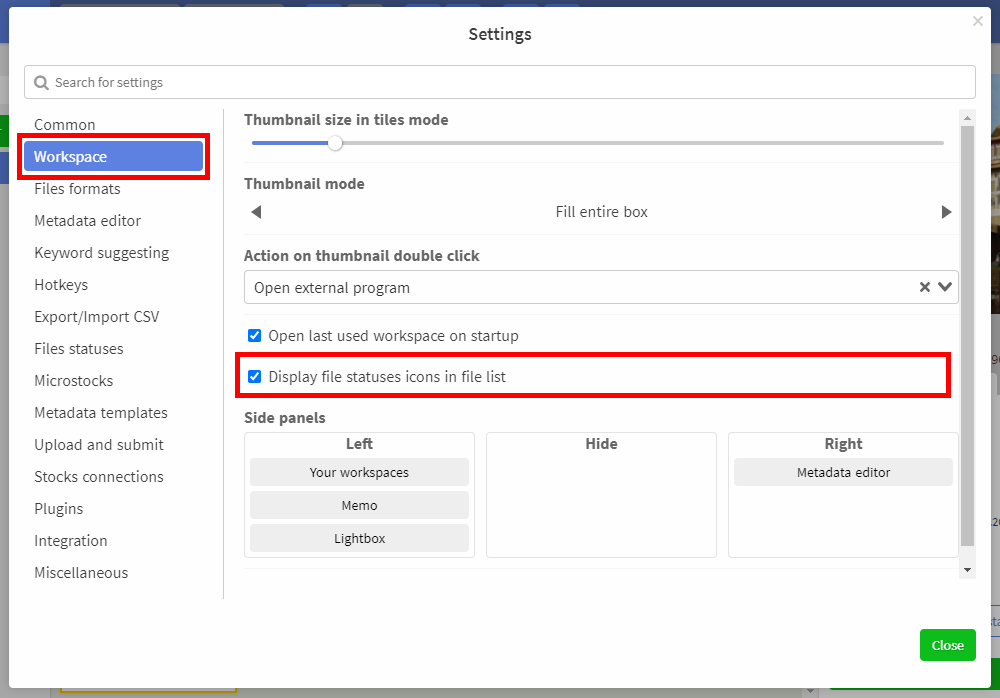
If you do not want the status icons to be displayed, go to the settings section Settings -> Workspace and uncheck the box next to Display file status icons in the file list.
# File types
The program supports the following file types:
Photos - JPG, JPEG supported
Illustrations - PNG format supported (+ JPEG preview)
Vector files - EPS, SVG files are supported (+ JPEG/PNG preview)
Video files - MOV, MP4, AVI, MPG files are supported (+ JPEG preview)
Sources - CR3, CR2, NEF, ARW, DNG, RAF, DCR, TIFF or TIF are supported
Releases - JPG, JPEG - are attached to the above files
# Feedback
If you have any questions, suggestions or you have met some issues, please let us know via the feedback (opens new window) form or in a special chat in telegram (opens new window)
And in order to stay in touch and be the first to know about all new changes in the program, subscribe to us on social networks: