# Introduction
# Creating new plugin
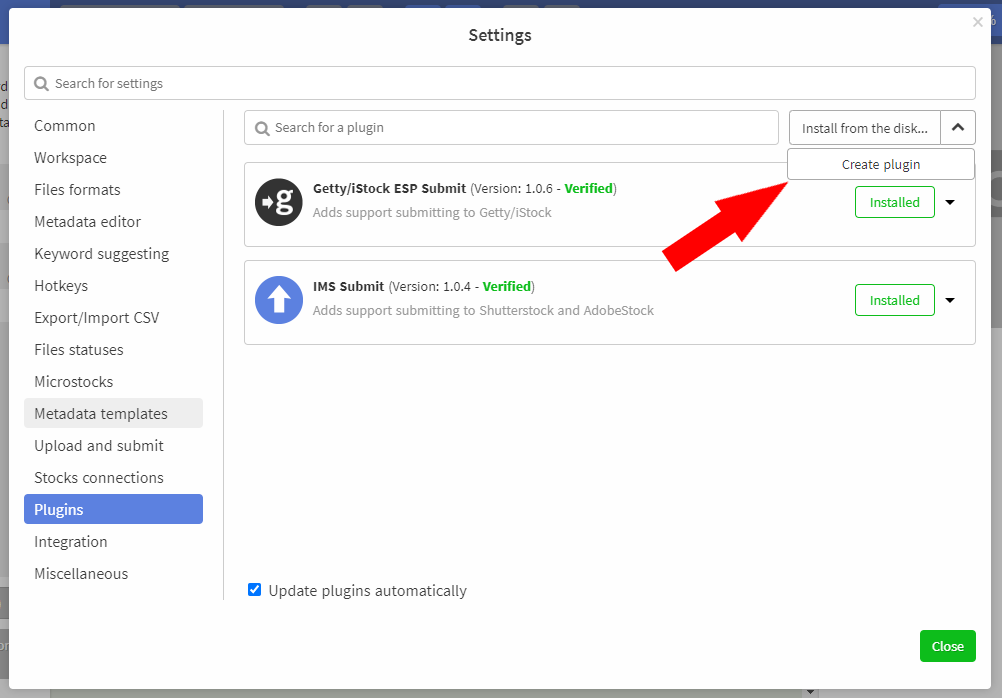
To create a plugin, go to Settings -> Plugins and click the Create plugin button.

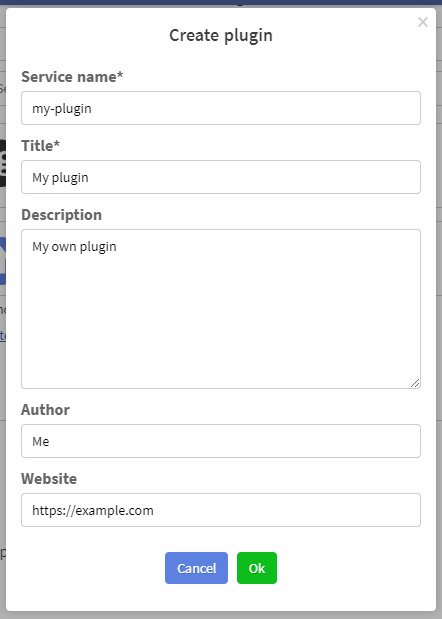
After that, select the folder where you want to save it and then enter the information about it.

After clicking on the OK button, a new folder will appear in the selected folder containing the plugin. Created plugin will be automatically installed in development mode.
TIP
A plugin installed in development mode is automatically updated every time its files are changing.
# Plugin structure
Inside the plugin folder, an index.json file will be created that describes the structure of the plugin. Example with is shown below:
{
  "name": "my-plugin",                       // 1. Service name of the plugin
  "title": "My plugin",                      // 2. Plugin display name
  "version": "1.0.0",                        // 3. Plugin version number
  "authors": "Me",                           // 4. Author's name
  "description": { "@t": "description" },    // 5. Description
                                             //    (for @t - see section "Internationalization")
  "website": "http://example.com",           // 6. Web site
  "icon": null,                              // 7. Icon
  "content": [],                             // 8. Plugin content
  "api": "2.9.0",                            // 9. Version of program plugin API
  "locale": {                                // 10. Localized Strings
    "en": {                                  // (see section "Internationalization")
      "description": "My own plugn"
    },
    "ru": {
      "description": "Мой собственный плагин"
    }
  }
}
name - plugin service name - used to identify plugins, so must be a unique string. A user cannot install two plugins with the same name at the same time
title - plugin display name - the name of the plugin that the user sees in the list of plugins
version - plugin version number, displayed in the list when expanding the plugin. Serves to be able to check whether the user has the latest version of the plugin installed or not
authors - author's name, displayed in the list when expanding the plugin.
description - a short description of the plugin, displayed in the list of plugins
website - link to the website of the plugin author
icon - plugin icon, displayed in the list of plugins. For the icon, use a 96x96px png file. To insert a link to a file, use the special directive:
{"@urlfile": "icon.png"}- whereicon.pngis the name of the file in the plugin foldercontent - list of plugin content (see next section )
api - plugin API version number. The plugin cannot be activated on a version of IMS Studio that does not support the specified API version. Actual number -
2.9.0locale - used to create localized plugins that support several interface languages (see the Internationalization section)
# Content of plugins
Plugins are containers for various program entities (for example, FTP connections). When installing a plugin, the program adds new elements from the plugin to the list of standard entities; when uninstalling, it removes them.
Each entity is described by the following structure:
{
    "type": "ftp",                              // 1. entity type
    "name": "my-connection",                    // 2. Service name
    "title": "MyConnection",                    // 3. Display name
    "icon": "https://example.com/favicon.ico",  // 4. Icon
    "content": {                                // 5. Content itself
        // ...
    },
    "locale": {                                 // 6. Localized Strings
    }                                           //    (see "Internationalization" section)
}
type - the type of the added entity. The following types are currently supported:
- destination - microstock
- ftp - FTP connection
- submit - submit process
name - service name of the entity
title - entity display name
icon - entity icon (usually a link to a favicon)
content - the content of the entity itself. Has a different format depending on the type
locale - is used to create localized plugins that support several interface languages (see the section Internationalization)
In order not to clutter up the index.json file, the description of the content elements can be taken out into separate files and included using the directive {"@jsonfile": "file.json"}, where file.json is the file name with connected content. For example:
// index.json
{
  "name": "my-plugin",
  // ...
  "content": [
    {"@jsonfile": "content1.json"},
    {"@jsonfile": "content2.json"},
    {"@jsonfile": "content3.json"}
  ],
  // ...
}